


I did some sketches for the Drawcember challenge back in 2015, but never got to properly finish any of them.
Also I'm still in the mindset of finishing all of my projects, that piled up since then.
And here's the painting progress:
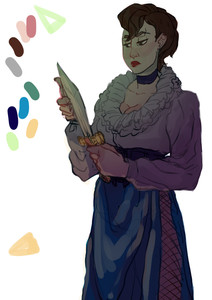
First I did the line art, then made a gradient colour on it to know where the light and dark parts will be.


Then I put up the base colours, coloured the line art.


Made a multiply layer with the gradient on top, then erased the parts I wanted the base colours showing more.
I put the yellow light into the picture later on, because in the beginning it felt a bit flat.


I painted on a new layer on top of the base one mostly, but from time to time I merged the layers, so I can shape and form it however I wanted.


I later changed the skirt and adjusted the composition a bit, which means I dragged her lower on the canvas. Also did a lot of painting.


For the background I've put a gradient there, with the colours from the first steps, then to incorporate the yellow light I've got into there I've painted in the colour, set the layer on overlay and adjusted the opacity. 🙂
I also put a border around her, because I felt like it.
Later on I cropped the background, so there's a little frame of some sort for the whole picture.
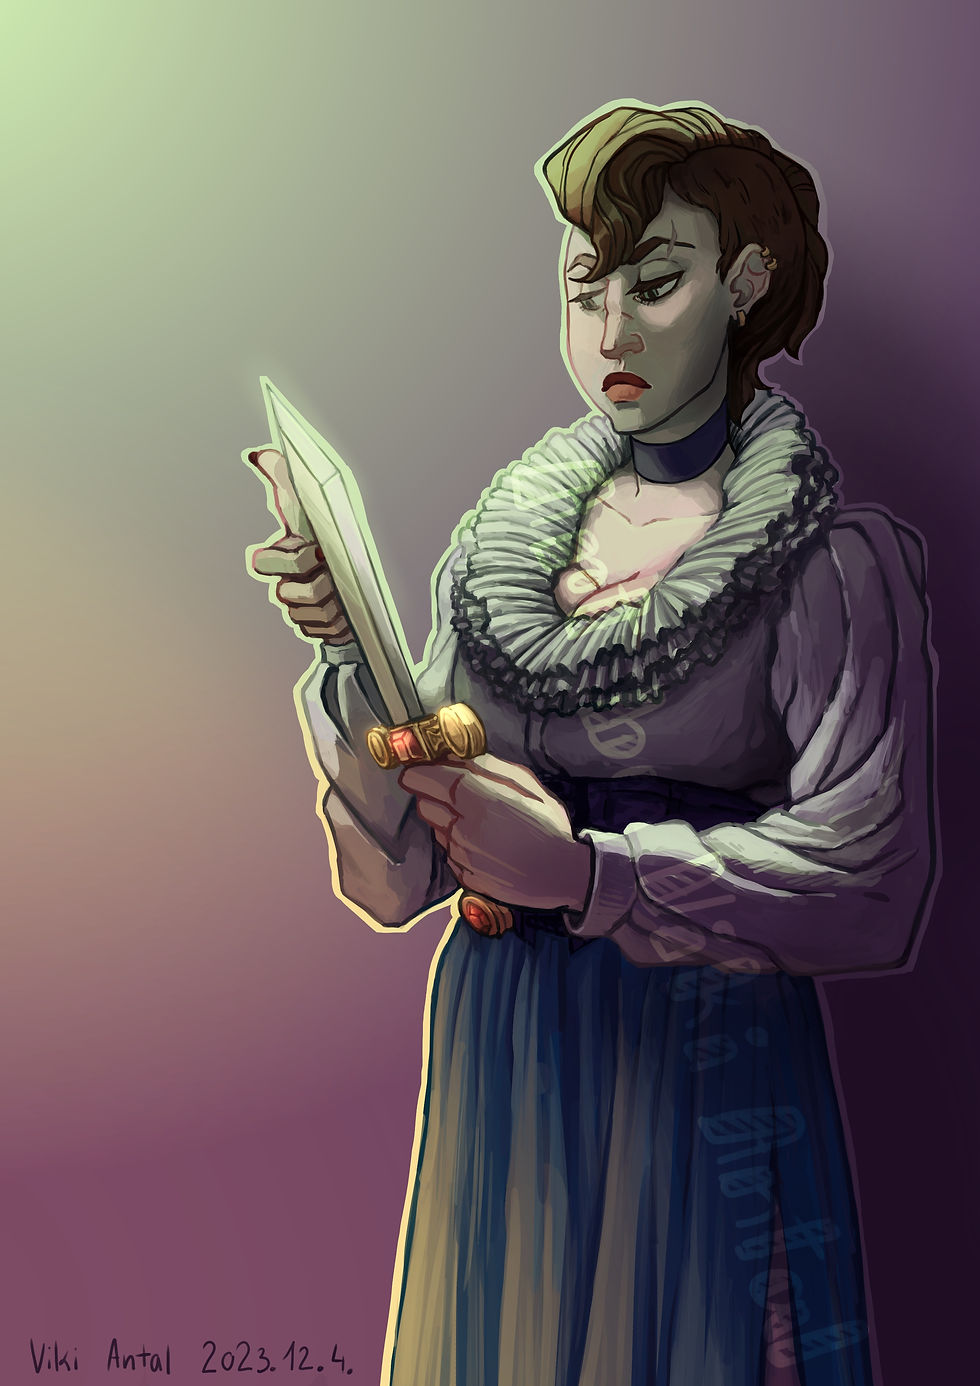
And here's the finished picture:

I really enjoyed the painting method of this piece. Even though I procrastinated on it for years. 😐
Hello everyone! Grab a cup of hot tea, or a glass of iced tea and join me into today's project breakdown! 🍵🍹
After the previous sticker sheet I made, I wanted to put the fluffy little cat, Lord Herrington, on another sticker sheet. And that is how this one is born.

Surrounded with potions, crystals, leafs and roses, Lord Herrington now has his own place. I'm still thinking on making an ONLY Lord Herrington themed sheet. I'll have to think about it.
For this sheet I decided to make it in a larger size than the previous one. I halved a B4 watercolor paper to get the size I would be comfortable painting on, and before painting, I did some tests and sketches about the stickers I wanted to incorporate.

I drew some crystals, because it's usually associated with witchy stuff and I also loved drawing an painting crystals years ago. I sadly kinda forgot, how I drew and painted them back then, so I looked up some images for reference. I just simply didn't wanted it to be a flop for me and hate it in the end. Although I still managed to mess up during the process, then save the crystals in the end.

I went into painting it twice in total. First I hated how the paint feathered on the paper also how the paper itself wrinkled up by the amount of water. So I treated the next paper as I should have done it with the first time. It helped, but some of my paints still feathered a lot, which was annoying and disheartening, when I painted in so nicely, then in few seconds the paint just ran out of the lines. Later I had similar problems when I painted the lineart. The only paints I had this problem was the Ecoline liquid watercolors. I believe the paper I used, which was a Canson Heritage cold press watercolor paper, and the liquid watercolors are not compatible with each other. Also with my previous work there was no problem like this. For that I used a Canson Montval watercolor paper. Both of them are 300gsm, but they have a different surface. I'm pretty sure because the Heritage paper is a more professional one and it was designed for heavy water applying. With that now I learned, that I have to use that paper for specific projects and with the right tools.
After putting up the base colors, came the time for the shades and secondary colors and then the line art, which was really fun. This is when everything got it's character and charm. I really loved painting the crystals and especially the roses!
When I detailed everything I went on putting in some additional details and finishing touches. This is when the whites and sparkles were put in. I also busted out my colored pencils too, to bring in some sharper edges and extra textures. I also corrected the feathered out parts, where the watercolor decided they take up more space then they were originally given.


Now it's pretty, and sparkly. The only thing left is to make them into stickers!
I went on and scanned them, made some corrections in Affinity Photo (a cheaper, but just as powerful alternative to Photoshop) so it looked like the original as much as possible. After editing I went in Clip Studio Paint and started to edit the sticker sheet. When I was satisfied with the sheet I printed them on an adhesive paper, so later I can cut them out. I personally love sticker sheets. That is why I decided to cut the sheets like that by hand too. Just like with the previous one I just grabbed my box cutter/precision knife and went into carving out the stickers as a Shilouette machine would do.
It was a lot of work, but I'm happy with the end result. Unfortunately one of the sheets were not cut through properly, so the stickers can't be peeled off, which is a shame and I'm not sure if the other two has the same problems or not, because I already put them in the envelopes I want to send to my sisters later. I just hope they were cut through.
For now I know, that I will have to edit the sticker sheet, because it's a bit too small and the stickers at some places are too close to each other, and that I'll have to be more precise, when I'm cutting the stickers.
Here's how my first sticker sheet attempts turned out. 🙂

Since than I went out and made some prints of it, so I now have a whole bunch of it in pretty, vibrant colours. I also removed some leaves, because at the end I didn't like them.


And that's it for now. I'm happy you joined me. I hope you drank as much tea as you could during this little read. See you next time, whichever it shall be. It's going to be a surprise, what kind of post I'll come up with by than. I have some already started projects, and a lot of waiting ones, so I'll have some tea time readings for you.
Bye~ 🍹
- May 31, 2021
Updated: Jun 8, 2023
I started working on some cute witch stickers for myself. In this post I’d like to share the process with you. 🙂 I love stickers, I already made a few sticker sheets in the past mostly for myself. I also had a failed attempt in opening a sticker shop. I had too few stickers to start with. Well, live and learn. Now I first want to make these stickers only for myself and maybe as gifts for family.
Also I’m personally not into the thought of making fan arts and popular stuff just to have a sticker shop up and running.
But I went off course already. Let’s go back to the witch stickers. Shall we!
I first had the idea to draw Gertrude the fluff witch based on a really old spread from one of my bullet journals.

Sketches of Gertrude the fluff witch.
Than I went on to draw the stuff she would use to create the little fluff creatures and potions. I thought these things would look lovely in my journal spreads as decorations.

I absolutely love the fluffy cat I drew. I want to put him on the sheet too, but you’ll see, that he couldn’t make it onto the first one.

After the sketches I started to draw the little potions on my watercolor paper, which is 10,5 x 15,5 cm. Not a fancy paper, but perfect in size for this project. At first I drew a lot of sparkles for each sticker, than I realized that I don’t want too much extra stuff and too big stickers. I just want more stickers, which needs more space, that is took by all the extra frill. In the end I draw a lot of glasses with potions, a bag, a few flowers, leafs and some fluffs, because of course, it’s a Fluff Witch’s potion kit. 🙂
I lightly erased back the sketch of these stickers, than went onto painting it. First I just played awkwardly with watercolors and tried to put up some basic colors. I honestly got stuck at this stage for a week or two, because I didn’t know what to do, what direction to go with them.

Luckily I got a surge of inspiration and a no game day put up for myself, so I was able to finish it in one day. 😀
Here are the stickers in their beautiful finished form:


Then I scanned these little beauties and made them into stickers.
It was a tiny bit of a challenge, because I used Affinity Photo a long time ago, so I didn’t know where were some options at first. But they turned out absolutely gorgeous.


They are so adorable. 😍
Also, yes I cut them out by hand with a precision knife. It’s tedious, but it’s better than cutting them out, then trying to peal them off with my short nails. Plus, there’s no problem with stickers falling to the ground and struggling pick them up with no nails.
So, there you go. Here’s how I made my little Fluff witch stickers.
Right now I have a lot of cute little sticker sheets to cut, use up and gift away.
I’m also thinking on making more sheets and try again with the sticker shop I wanted to do. What do you think about it? If you have any ideas for stickers, let me know and I might make them. 😉
That’s it for now. 🙂
See you next time. Until then, have a nice day!
Bye~ ❤


